|
| Gem brooches with sapphires, rubies, garnets and pearls. |
Some projects with precious stones and pearls are taking much more time then I would ever imagine. But the way from choosing an object, untill a finished item is a long way.
The most tricky part is the gems. Finding a write type od stone, shape, size, colour and quality that will not ruin the budget takes time.
For this little brooch I ordered pearls three times before I got the right ones.


First choose your jewel and find, as many photos, drawing and information about it, as possible. Sometimes it requires a visit at the museum and making some extra photos from different angels to have enough material to start in the workshop.
I probably will end up with buying some extra museum catalogues and publications ( you can never have enouth of them! ).
This time I have chosen the brooch from the Erfurt treasure, small elegant with a pin type that is easy to put on the thick textile like a felt hat or a woolen houpelande.
I havent been at the museum in Erfurt yet, but the is a very detailed caltalouge from the exhibition that gives me all the details I need.


The next stage is finding the right measurements. That you get for the museum database item descriptions or you need to estimate it by your own.
Making several templates from paper or brass to make sure everything is right, before cutting the metal parts in silver.


Now the I can finally start in my workshop. Cutting and constructing all elements.
At this stage I already need to have all the stones and pearls. When I am sure that all parts fits together I may solder it to one piece.

 A silver brooch base after soldering and cleaning in the acid.


To set a stone I need to make a tight bezel and after inserting a stone press it tightly around with a polished steel tool.
Pearls are bit more problematic. If I plan to gold gild the brooch I cannot install the pearls - they are to delicate to survive the acid bath which is used for galvanic gilding. That means I need to rivet it as the very last stage of making the jewel.

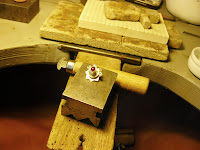
 Hammering the rivets on back of the pearls requires a steady hand - be sure you hit the metal 0.7mm rivet not the pearl, otherwise you wil need to start all from begining.
Making the first item is always a long process. Next ones can be made much quicker as I do not need again that much time for reaserching, setting measurments and making templates.
But for me whole this stage is the most chalenging and exciting. All those preparation before I even sit in the workshop are the most imoportant and will affect the final look of the project.
The rest is just precision, steady hands and some hours playing with metal: sawing, filing, drilling, soldering, polishing, stone setting, riveting...


Making the first item is always a long process. Next ones can be made much quicker as I do not need again that much time for reaserching, setting measurments and making templates.
But for me whole this stage is the most chalenging and exciting. All those preparation before I even sit in the workshop are the most imoportant and will affect the final look of the project.
The rest is just precision, steady hands and some hours playing with metal: sawing, filing, drilling, soldering, polishing, stone setting, riveting...